![]()
LinkRunner G2™
The World’s First Smart Network Tester for the Connected World
Simple, comprehensive, Android-based testing platform improves the effectiveness of network professionals, accelerating device deployment and connectivity troubleshooting.

Starting Up
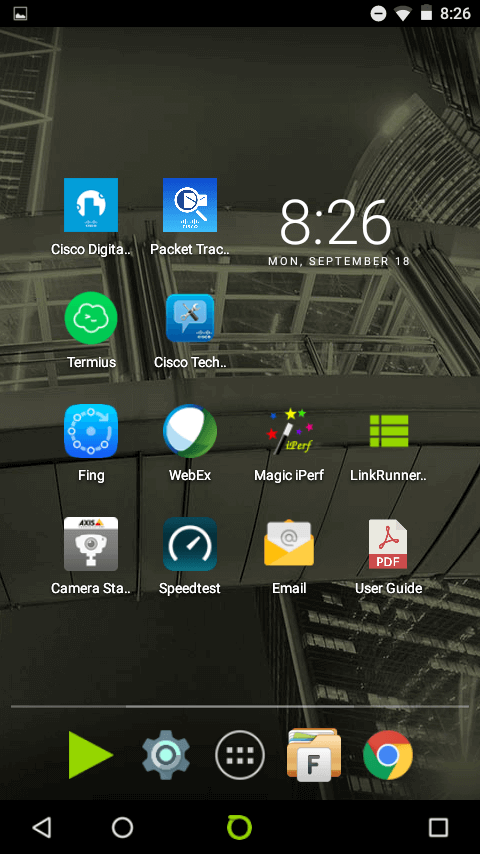
Home Screen
AutoTest
Tap on the green NETSCOUT “O” button on the bottom center of screen to select AutoTest.
Android Apps for LinkRunner G2
As a Smart Tester, the LinkRunner G2 has the ability to download Android-based apps, allowing users to do more with a single device.
- Tap the App Store icon to see some of the available apps.
- Tap the Cisco Digital Building app for an example of app usage with the Linkrunner G2.
Reference & User Guides
Need to reference some technical documents? Use a vendor App, access it via the Chrome web browser or click on a .pdf document accessible via downloaded to your LinkRunner G2 or from the integrated micro SD or USB ports.
Tap the LinkRunner G2 User Guide PDF.

Reference Documents
.pdf document reader allows you to have helpful support documents at your fingertips.
Reference Documents
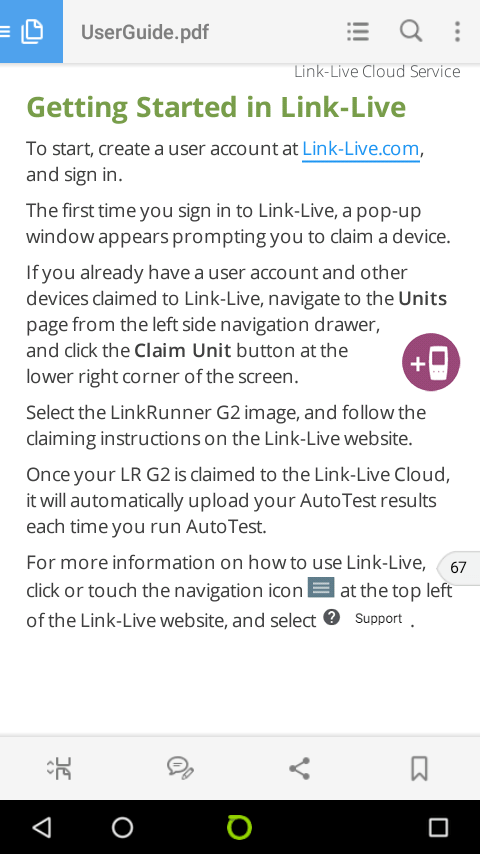
Don’t forget to CLAIM your LinkRunner G2 to the included Link-Live Cloud Service to facility automated test result upload and easy printed reports.
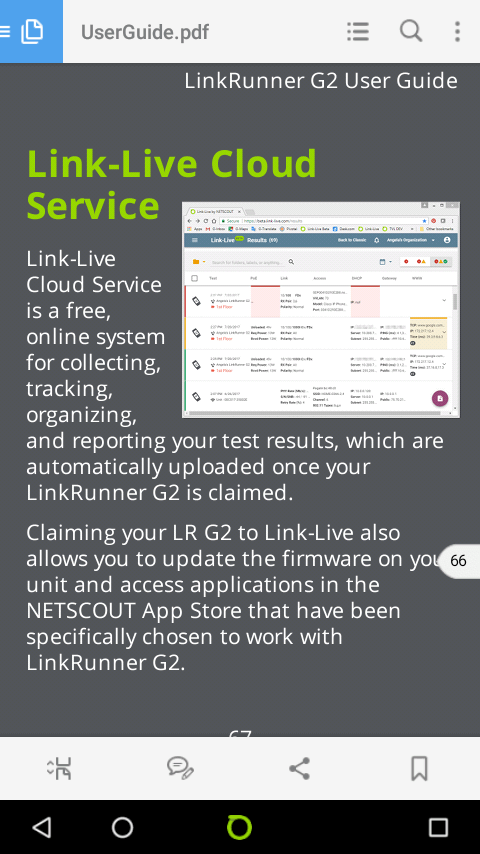
Link-Live Cloud Service
Link–Live allows automated test result upload from NETSCOUT’s entire hand-held network tester line-up so you can have one consolidated location for all your test results across copper/fiber/Wi-Fi.
Link-Live is included with all hand-held testers and supports an unlimited number of results/users/testers.
Reference Documents
Link-Live allows you to build a baseline of connection paths and test results, which will come in handy down the road for reference should a problem arise.

Reference Documents
Having the User Guide and other useful reference documents you may choose to store on LinkRunner G2 eliminates the need to carry printed documents.
Tap on the HOME icon to return to the home screen.

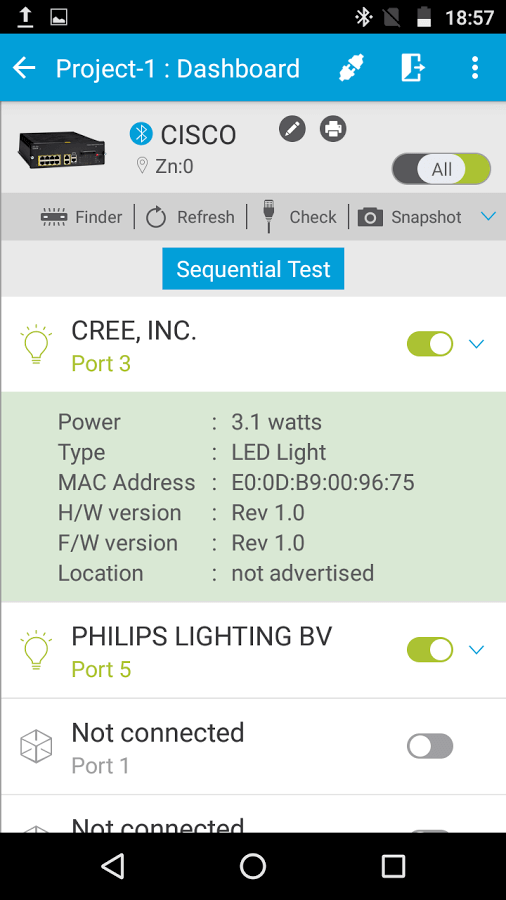
Cisco Digital Building App
Here is an example of an app that can be used to simplify the installation of a device. It enables the lighting installer/electrician to validate, configure, diagnose and verify the device installation.
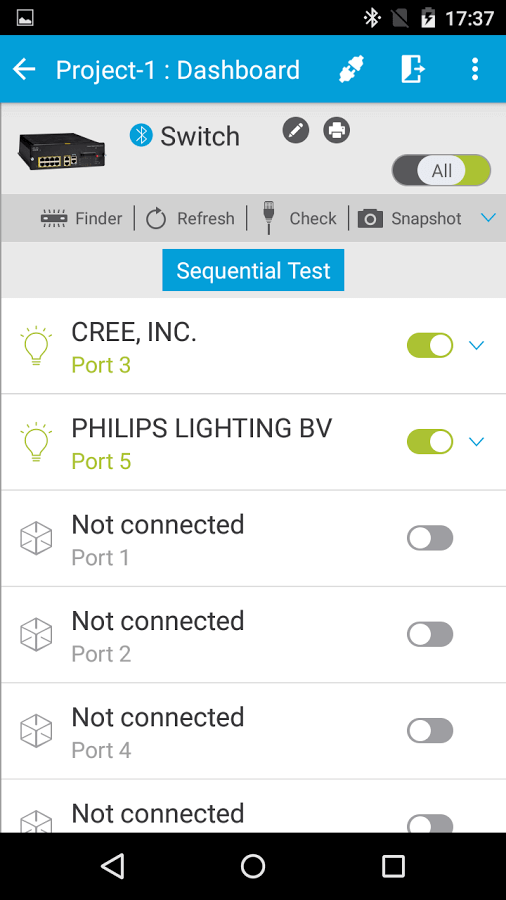
Cisco Digital Lighting
- Connect to the switch via Bluetooth or serial console.
- Monitor status of Switch and get a snapshot on health of the device.
- Get summary or detailed information on the downlink ports.
- Enable port LEDs on the switch.
Select CREE, Inc. to see more
Cisco Digital Lighting Details
- Validate your PoE and non-PoE, IoT device connections.
- Print switch and port labels.
And more…
Tap HOME icon to return to home screen.

NETSCOUT App Store
Browse and download free Apps to personalize and extend the functionality of your LinkRunner G2.
Don’t see your favorite business App? You can request it be added through the included Link-Live Cloud Service.
Tap HOME icon to return to home screen.
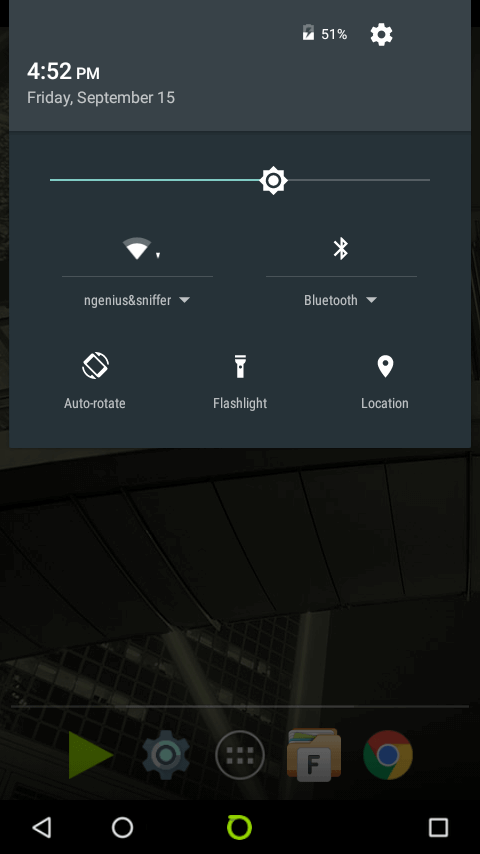
WiFi and Bluetooth Support
Using the optional Edimax combination Wi-Fi and Bluetooth USB adapter, you can verify what SSIDs and Bluetooth devices can be seen on your network as well as any other standard Wi-Fi or Bluetooth access capability that you might use along with your favorite Android App.
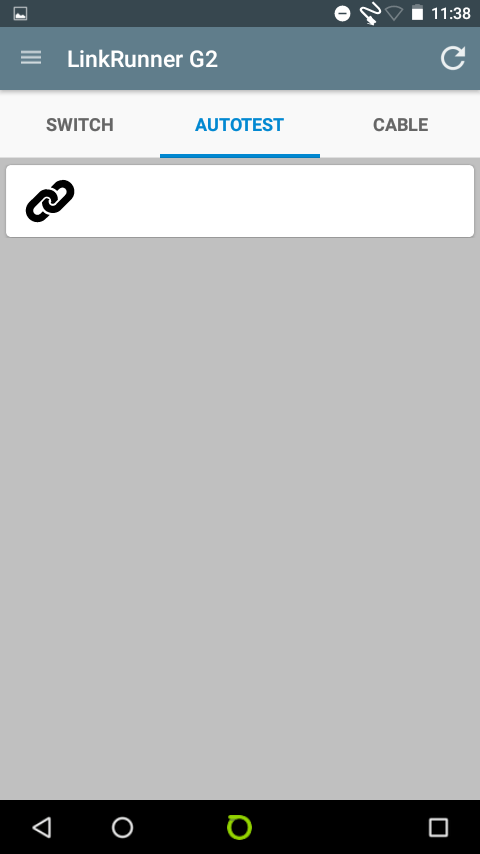
AutoTest
The AutoTest performs a complete network connectivity test in just seconds.
The AutoTest displays:
- Loaded PoE across all four pairs
- Link speed/duplex
- Switch properties including slot/port/VLAN
- DHCP services/Static IP
- DNS servers connectivity
- Gateway connectivity
- Ping and TCP port connectivity
Or select SWITCH or CABLE to test.
Or tap the HOME icon to return to the home screen.

AutoTest Summary
AutoTest performs seven vital test to confirm network connectivity in less than 10 seconds.
At the completion of each test, you are presented with a single screen summary of all results with a pass/fail/marginal indication.
You tap on each test to see more detail.
Tap PoE test or select the setting menu to change settings.
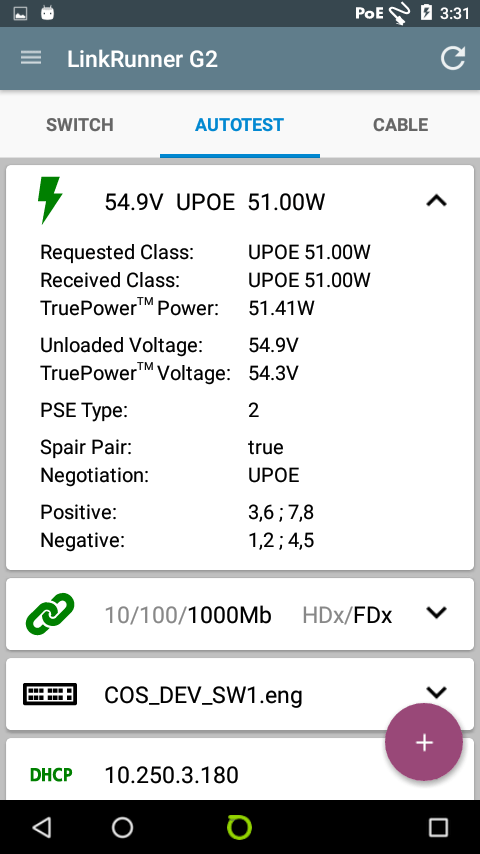
PoE Test Detail
LinkRunner G2 is uniquely able to validate loaded UPOE up to 51W at the powered device across all four pair. This capability is essential during deployments of network connected devices that require PoE and can be the means of resolving finger pointing when issues arise.
Tap on Link test to see test detail.
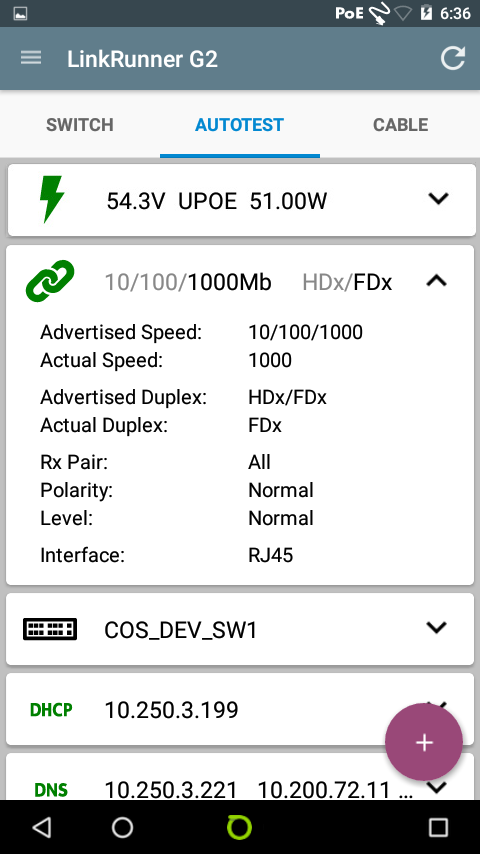
Link Test Detail
LinkRunner G2 provides an in-depth look at link speed and duplex. It will also warn you if for example you are not receiving the 1000Mb speed you were expecting. The actual speed would be noted in bold and link icon would turn yellow.
Tap on Switch test to see test detail.
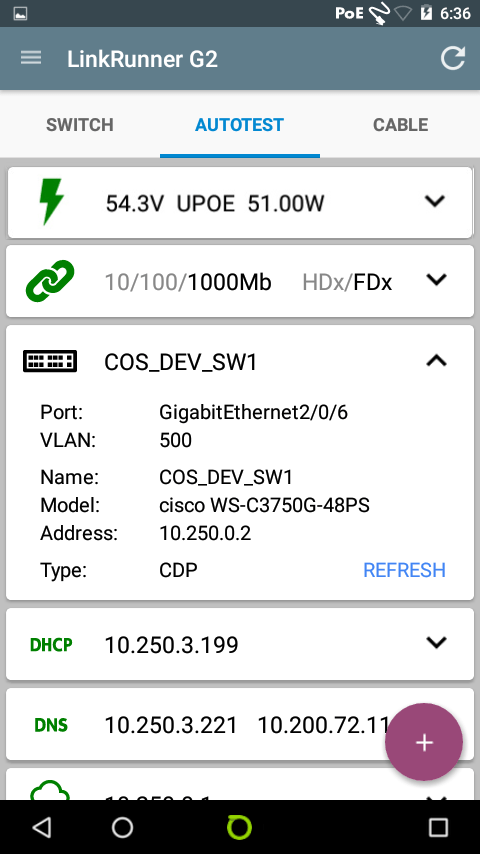
Switch Test Detail
This test provides all the detail you need to quickly understand switch connectivity from the port you connected to included Slot/Port/VLAN/Voice VLAN.
Click on REFRESH to see the next VLAN.
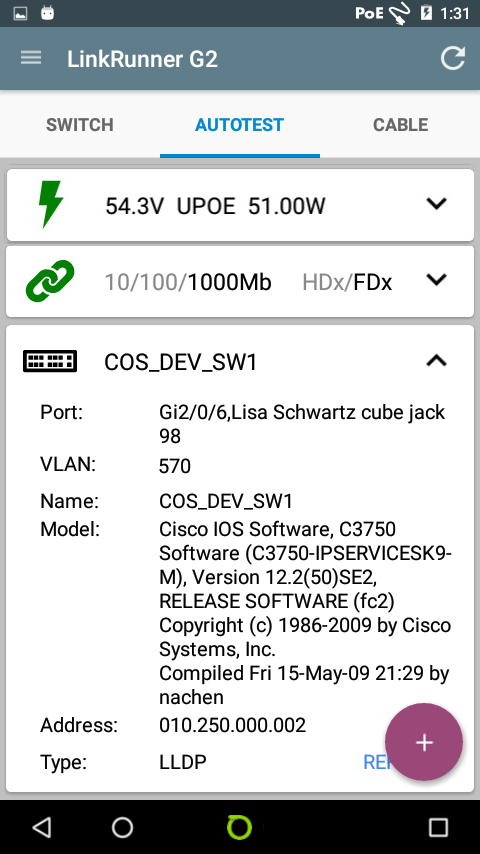
Switch Test Detail - Refresh
This shows the details of the refreshed Switch test.
Tap the back arrow.

Switch Test Detail
This shows the details of the Switch test.
Tap on DHCP to see test detail.
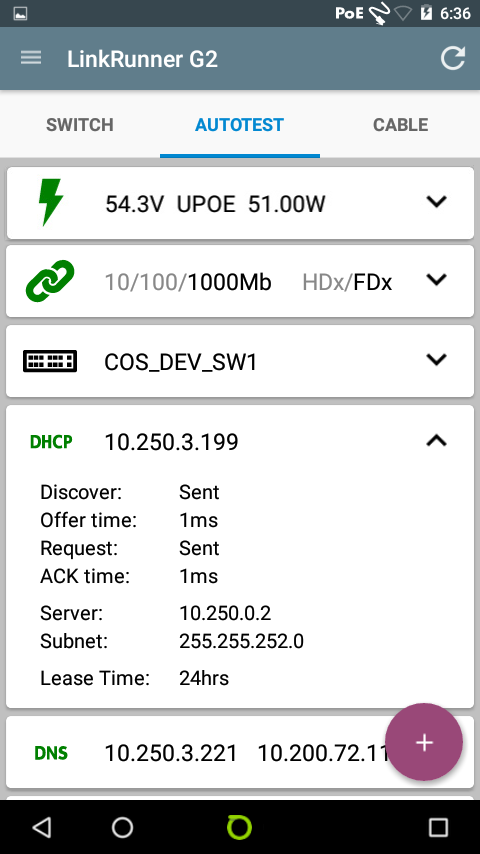
DHCP Test Detail
This shows the details of the DHCP test. Static IP address configuration is also supported.
Tap on DNS to see test detail.
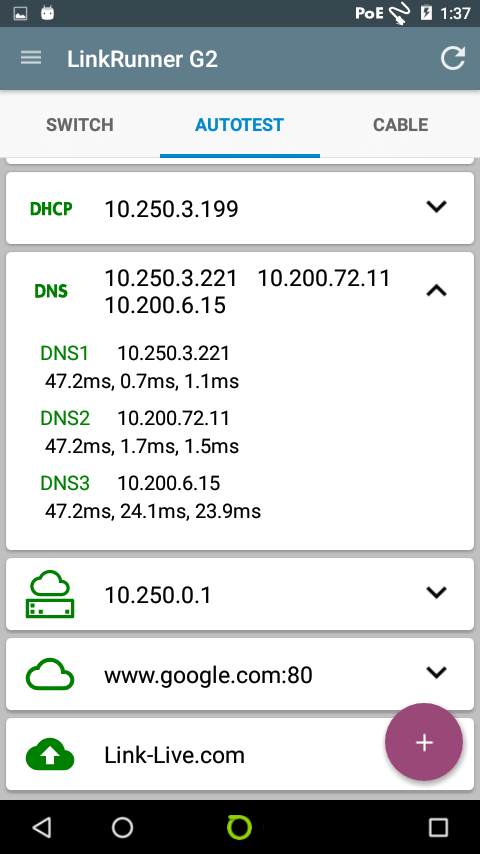
DNS Test Detail
This shows the details of the DNS test.
Tap on Gateway Router to see test detail.
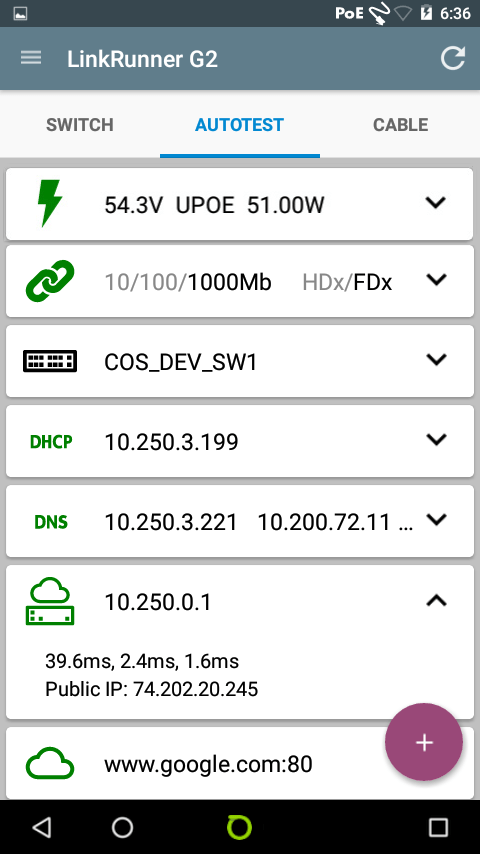
Gateway Router Test Detail
This shows the details of the Gateway Router including Public IP, handy to verify service provider connection routing.
Tap on Reachability Test to see test detail.

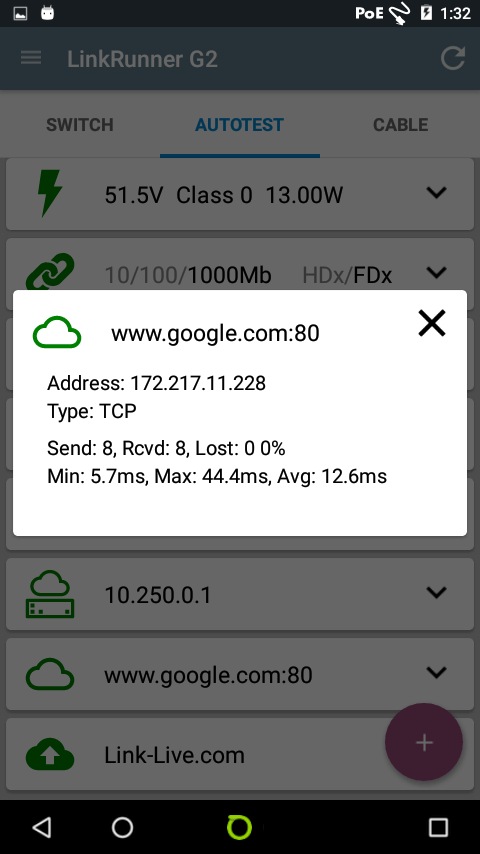
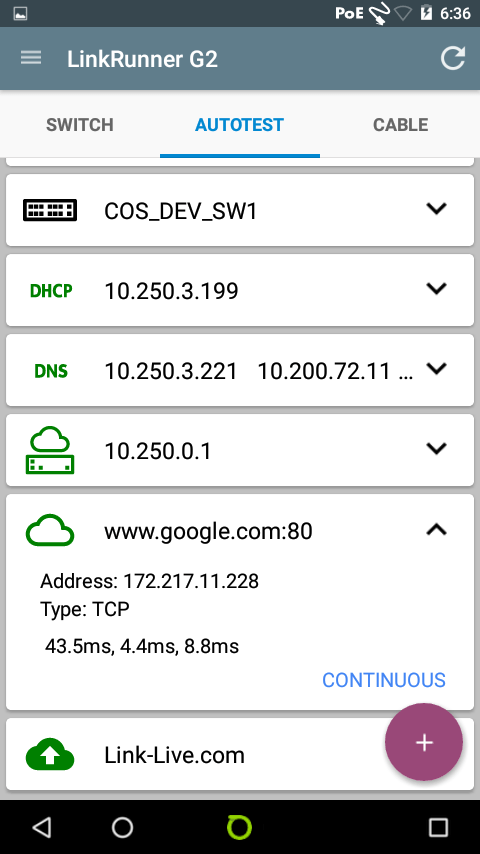
Reachability Test Detail
This test verifies reachability. You can configure an unlimited number of targets to validate connectivity to in a single AutoTest.
Tap on CONTINUOUS enter into monitoring mode.
Reachability Test Detail – Continuous Ping
Continuous monitoring of ping and response is handy to help identify intermittent connectivity problems.
Tap close to go back.
Reachability Test Detail
Now, tap on the more icon to add a photo or comment.
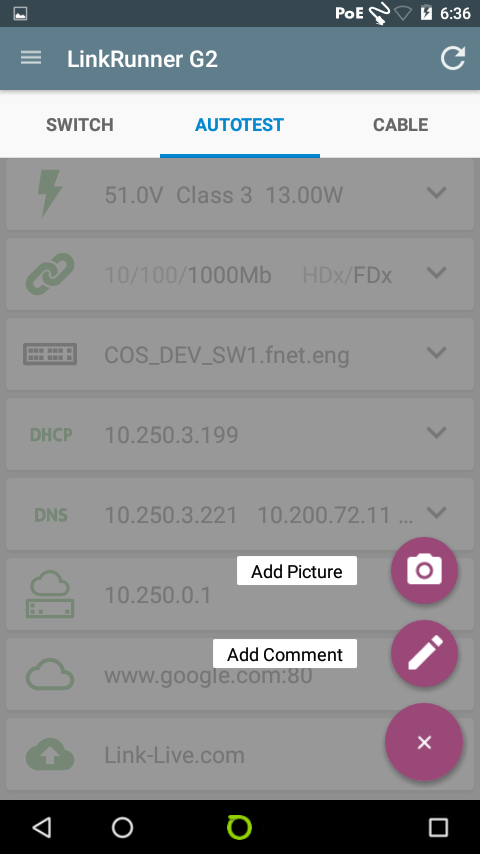
Add Photos and Comments to a Test Result
Tap on the Photo icon to snap a picture with the integrated camera to attach to your AutoTest.
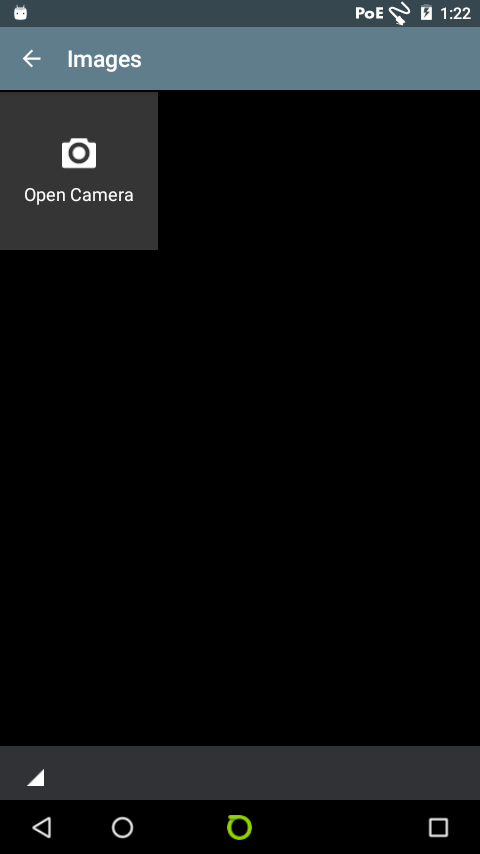
Add Photos Step 1
Select camera or an image already taken if you have one in your photo gallery.
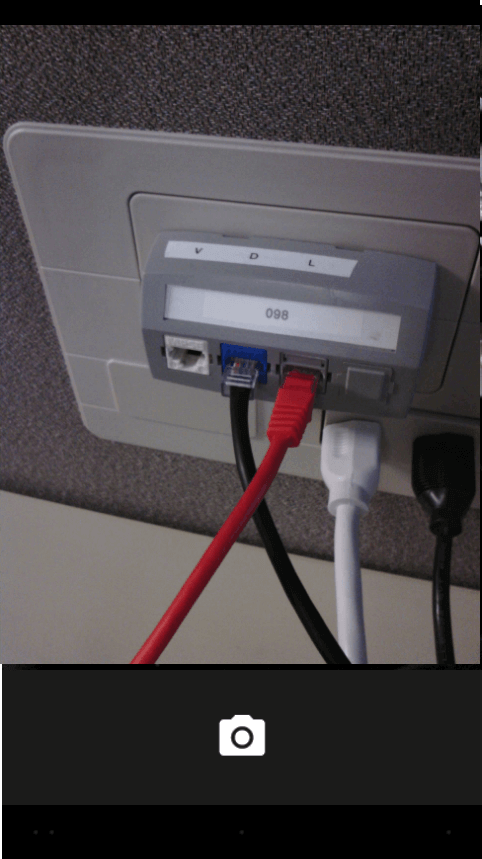
Add Photos Step 2
Snap a picture.

Add Photos Step 3
Tap the checkmark to accept the image and see it associate to your test.
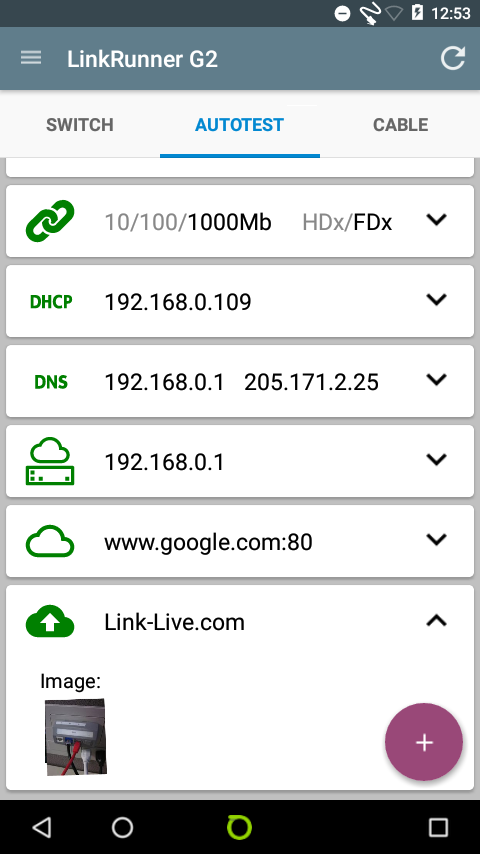
Image Added to Test
Useful images to add to the test result are things like jack number, damaged cables or jacks, or asset tags.
Have QR or Barcodes on your end devices? Download the QR/Barcode reader App, scan the code with the camera, and attach it to your test result.
Tap the more icon to add a comment.

Add a Comment
Select Add Comment.
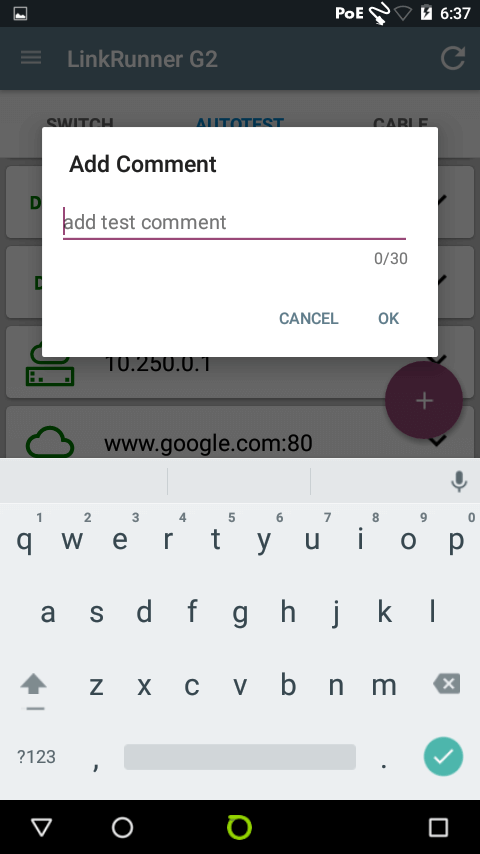
Comment Field Opens
Tap in the comment field.
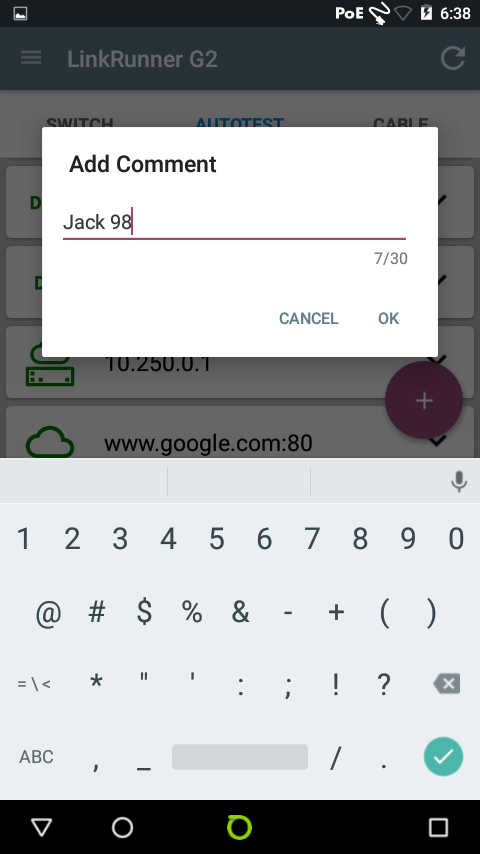
Write Comments
Insert text such as Jack location and select ok.

Comments Added to Test
See your comment associate to your test result.
That information automatically uploads to the included Link-Live Cloud Service at the end of each test.
You now have a record of Jack to switch slot/port/VLAN path as well as images about the connected device.
Now select SWITCH or CABLE to start another test.
Tap on the HOME icon to return to the home screen.

Switch Test - Copper
Displays critical nearest switch information including:
- Switch name and model
- IP address
- Slot, Port, VLAN/Voice VLAN
- Speed & duplex: actual (black) & advertised (grey)
- PoE and pairs used
Tap the More icon to see the Flash Port.
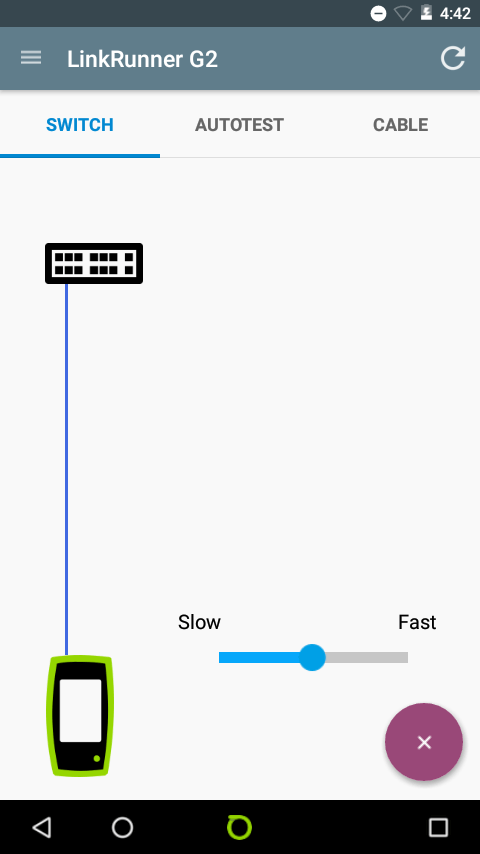
Flash Switch Port
Flashes the LINK LED on the connected switch port. This can help locate the switch port in a closet.
Set the Flash Port flash rate from slow to fast to differentiate from the other switch port LED flash rates.
When done, press exit.
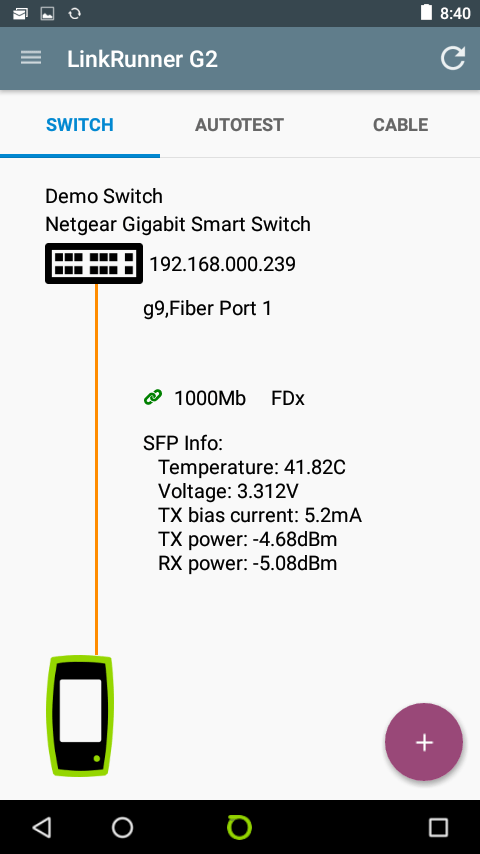
Switch Test - Fiber
Displays the same nearest switch link speed and duplex information in addition to SFP characteristics and receive power.
Tap AUTOTEST, CABLE, or Home icon.

Cable
LinkRunner G2 provides TDR based cable measurements.
- Cable length
- Distance to fault Open/Short/Split
- Reversed & crossed pairs
This 1000BASE-T wired cable has an open pair at a distance that might be representative of a patch cable.
Or tap more icon to activate toner.
Loopback Test
Test a patch cable with the loopback test. Plug each end of the RJ-45 cable into the two RJ-45 ports on LinkRunner G2.
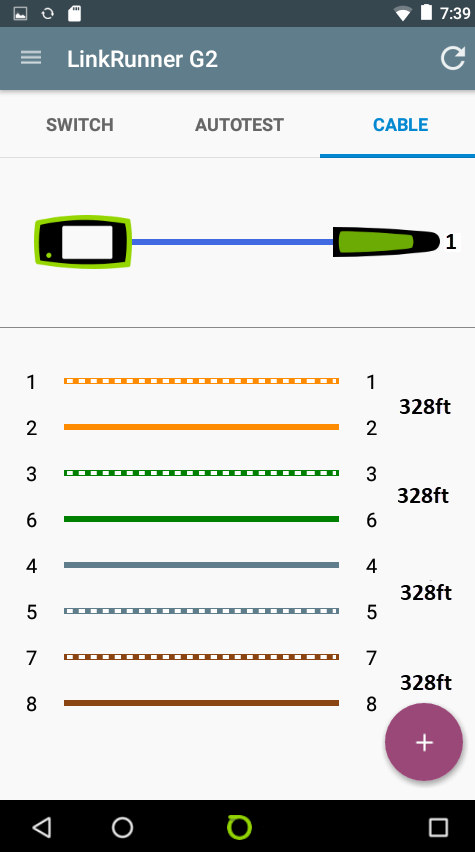
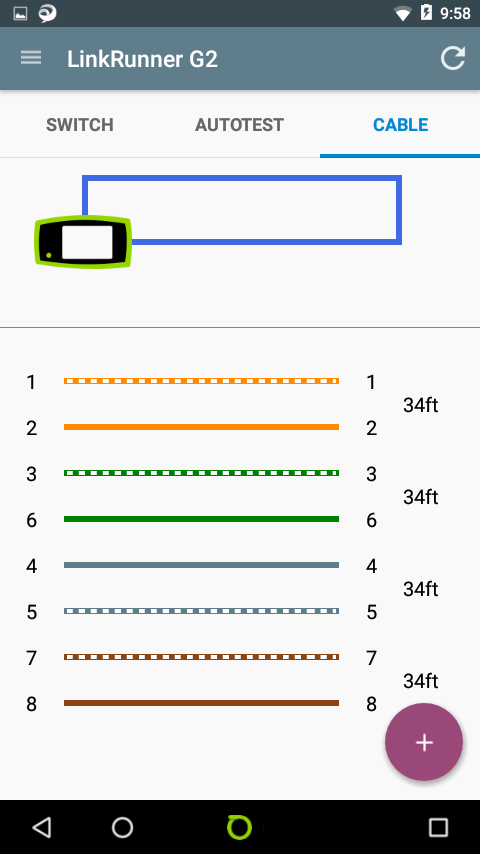
Cable Test with WireView Adapter
Locate undocumented cable paths with the WireView Adapter.
Plug LinkRunner G2 into one end of the cable and a numbered WireView Adapter in the other. LinkRunner G2 will tell you what number adapter plug you hit, helping you to understand the connection path.
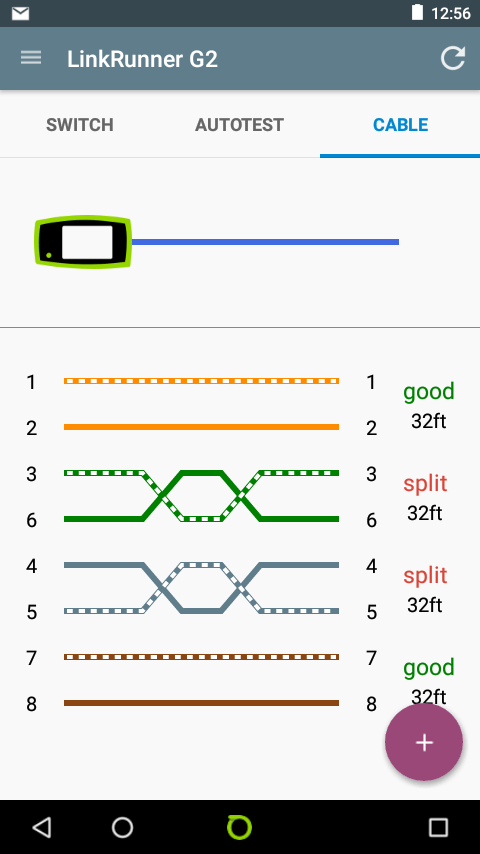
Cable Test
Split pair test result.

Cable Test
Short test result.

Cable Test
Reversed pair test result.
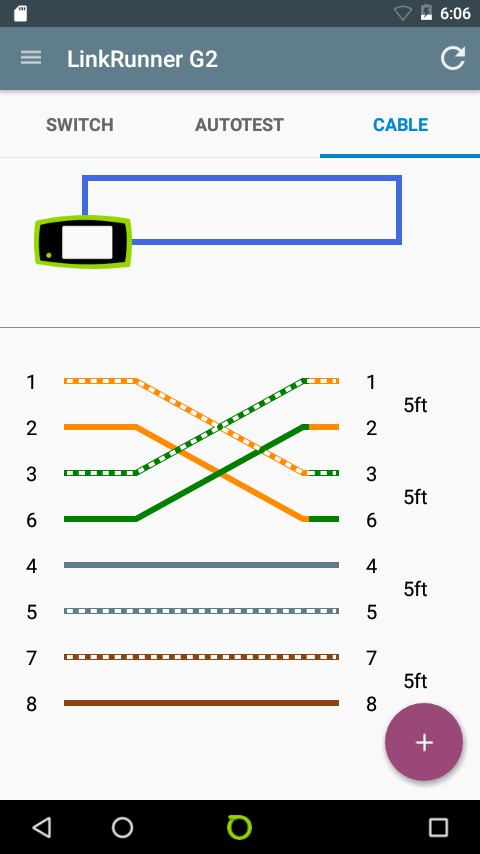
Cable Test
Crossed pair test result.
Select AUTOTEST or SWITCH, or Return to Home.
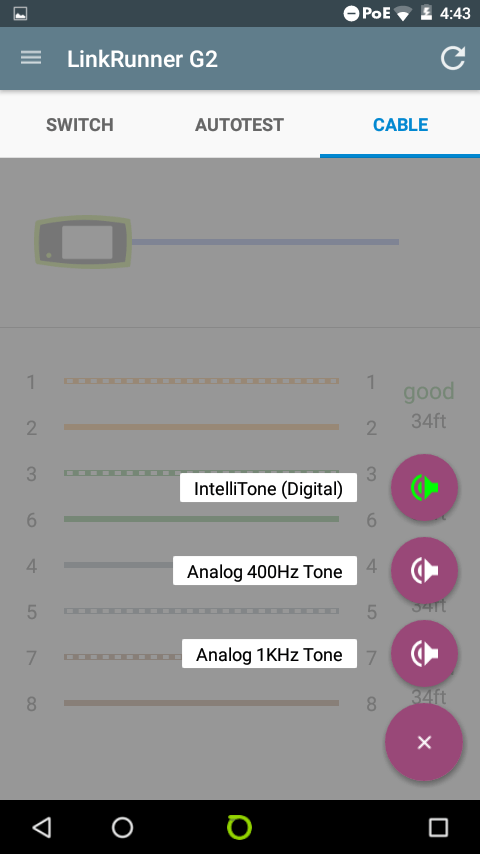
IntelliTone Probe
Another way to identify connection path is the toner and probe method.
Select Digital or Analog tone to use with the handheld probe that picks up the signal to locate the cable.
Tap the close icon to return to cable test.

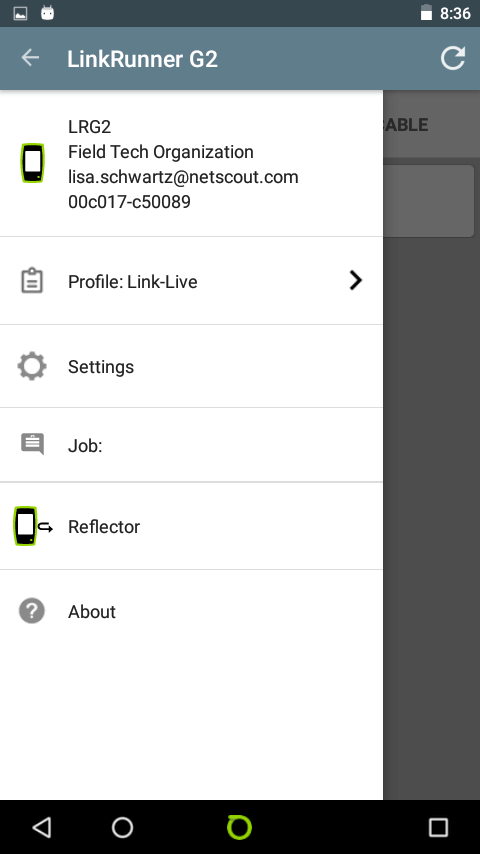
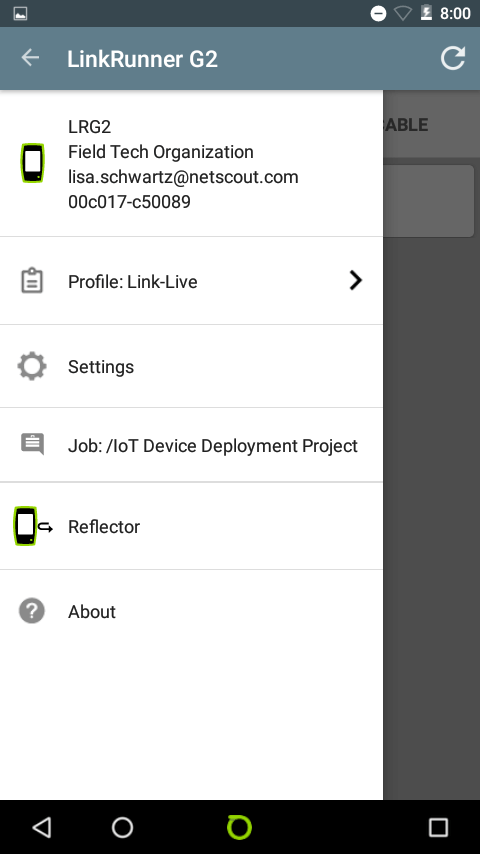
Profiles and Settings
This is where you can select or create custom profiles, change AutoTest settings, create job folders and labels or enter into packet reflector mode when used with a OneTouch or OptiView XG.
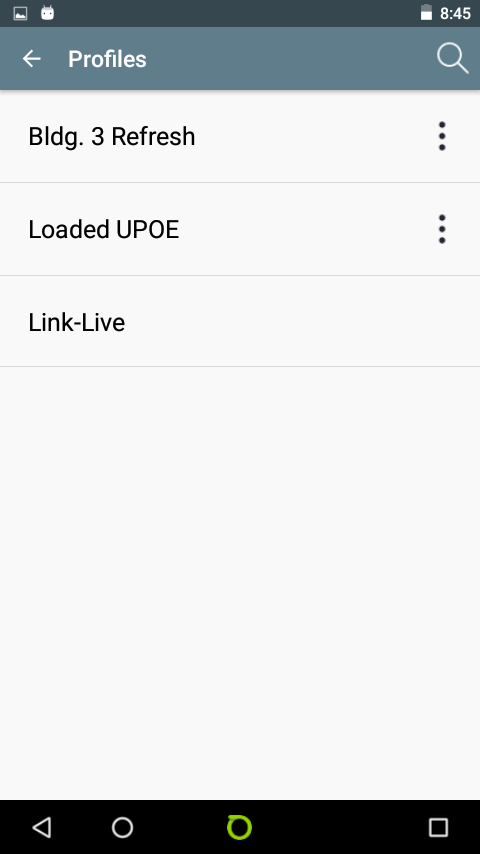
Profiles
An unlimited number of profiles can be configured. Profiles are handy when the tester is used across multiple job sites with differences in the way an AutoTest needs to be configured.
It also comes in handy to ensure technicians of any skill level can run a standardized set of test by simply selecting a pre-defined profile.
Select back arrow to return to settings.
Create a Job Folder
Using Job folders allows for automatic filing of test results into the folders you create.
Folders you create with LinkRunner G2 will appear in Link-Live along with all AutoTest results for tests ran when that folder name was defined.
This eliminates the overhead of managing results post projects as all test results were automatically filed for you.
Tap on Job to create a job name.

Name Job Folder
Tap on job comment field to input a name for the job folder…
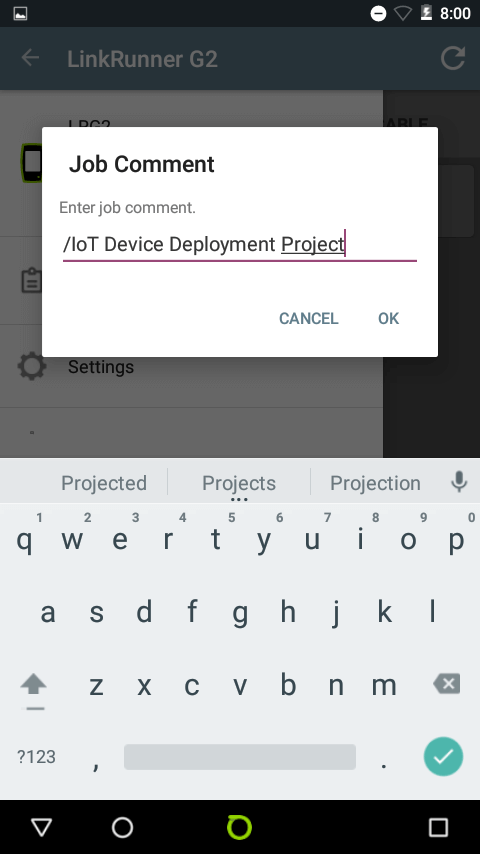
Name Job Folder
...then select OK.
Edit Job Settings
See Job name listed as part of your AutoTest settings.
Use settings to customize the AutoTest.
Tap on Settings to edit the job settings.

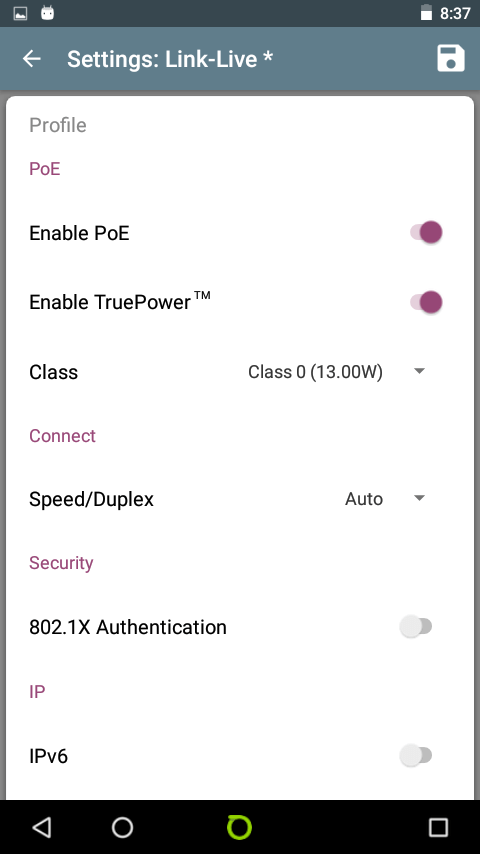
PoE Testing
Turn on Enable PoE to measure both Voltage and Wattage including pairs used.

TruePower™ PoE
Tap Enable TruePower to enable the patented TruePower™ PoE measurement.
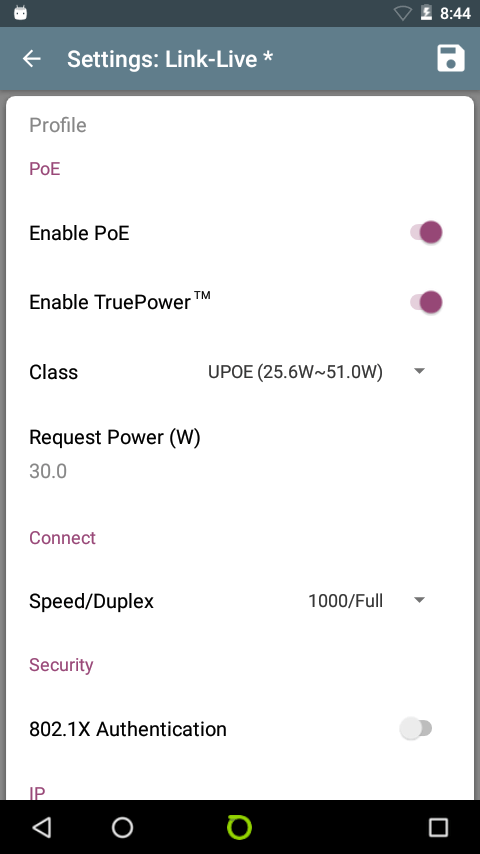
PoE Load Testing
TruePower allows you to quickly validate PoE performance by drawing actual power up to UPOE 51W.
Load the circuit to stress switches, cabling and patch panels, all while measuring the voltage and pairs being used. The ability to validate the TruePower delivery before installing lighting, cameras, Aps, phones and other IoT connected devices will ensure a smooth deployment.
Tap on Class to select class type.
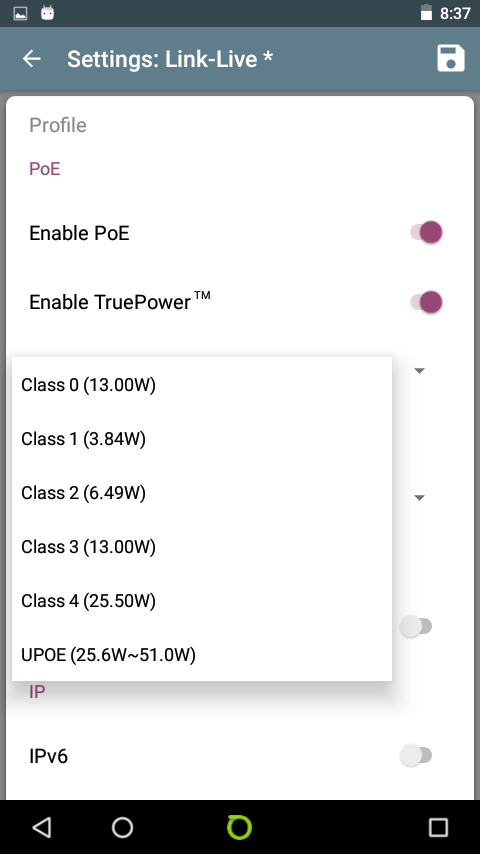
PoE Load Testing
Select what Class of PoE or UPOE you want to measure.
TruePower will report the requested power vs. received power and uniquely supports this testing across all four pair.

Speed/Duplex Setting
You can choose to use the Auto Speed/Duplex configuration and LinkRunner G2 will report to you what it measures.

Speed/Duplex Setting
You can optionally choose to set a specific Speed and Duplex and LinkRunner G2 will give you a warning indication if it measures a different speed and duplex then you were expecting.
Tap on 1000/Full
Speed/Duplex Setting
A common setting is 1000BASE-T to ensure each link is performing as expected. If LinkRunner G2 sees a lower speed, it will give a yellow warning indication in the test results and bold the actual speed.
Tap on 802.1X Authentication.

Security
Verify access to secure networks using 802.1x and MAC Access Control Lists (ACL).
Turn on 802.1X.
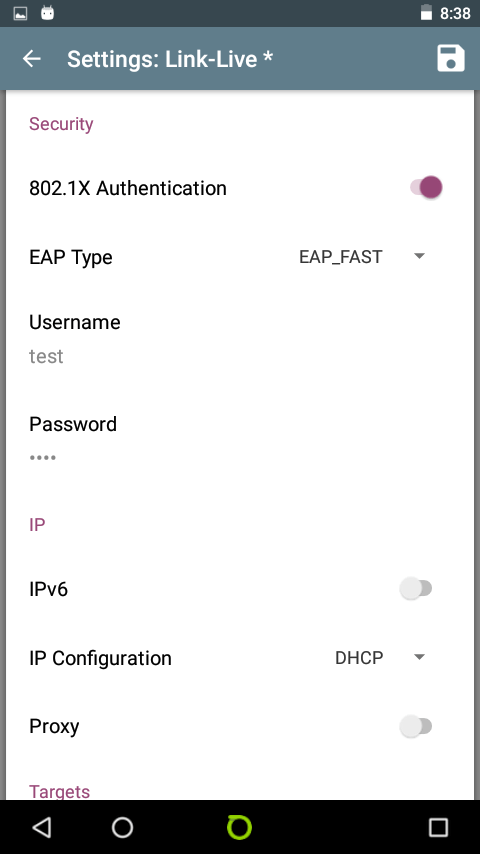
Security
Configure EAP type.

Security
Select your EAP type.
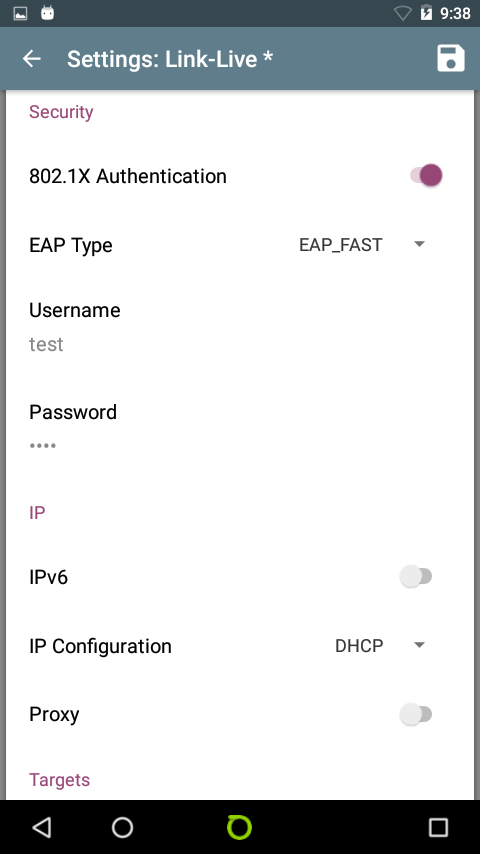
Security
Tap IPv6 to enter additional security information.

IPv4 and IPv6 Support
LinkRunner G2 operates at IPv4 by default but offers the option to test IPv6.
Validate the IPv4 DHCP auto-negotiation process, subnet and DHCP server. Verify IPv6 Link-Local and Global addressing.
Tap DHCP.
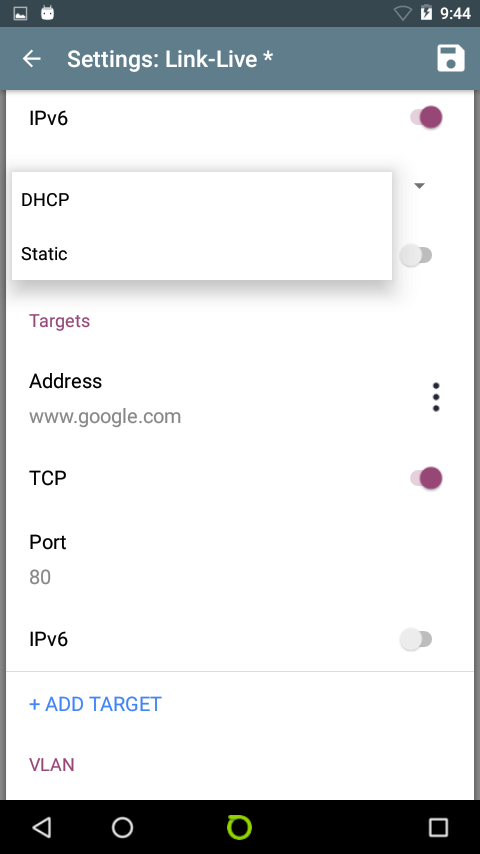
IP Address Validation
LinkRunner G2 uses DHCP by default but offers the option to use a Static IP Address.
Select Static.

IP Address Validation
If Static IP Address is needed, turn it on and complete applicable fields.
Tap the back arrow.

Proxy Support
If Proxy settings are required, turn on Proxy.

Proxy Support
Complete applicable fields.
Tap the back arrow.

Reachability
LinkRunner G2 supports an unlimited number of definable targets to verify reachability by performing either a Ping or a TCP port open test.
Tap the more icon.
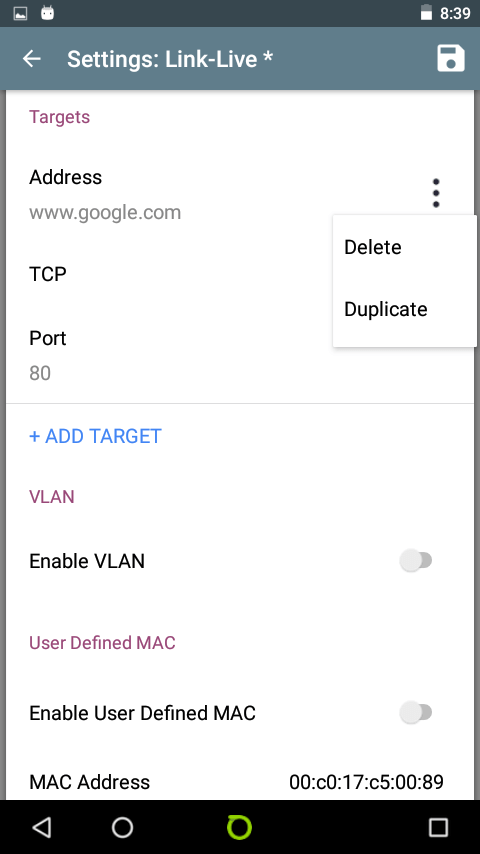
Reachability
By default, LinkRunner G2 pings www.google.com. This can be removed if you don’t want this part of the test to run or you can modify it.
If you want to add a target, select ADD TARGET.
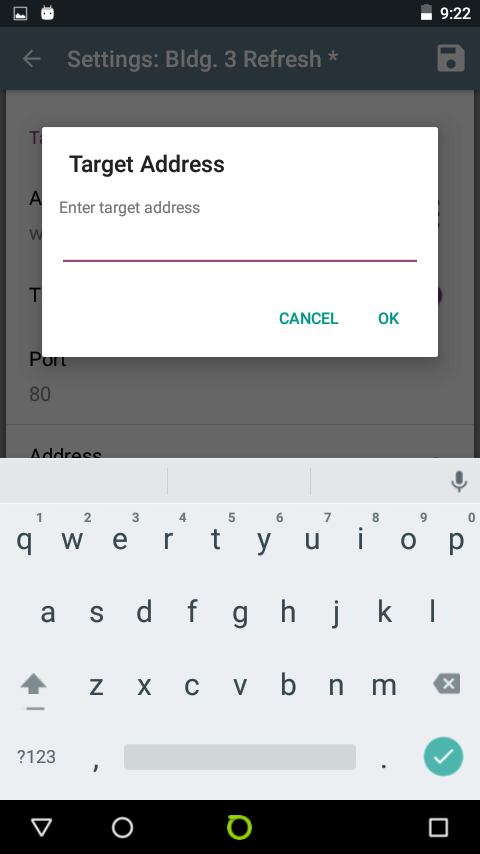
Reachability
Input your target address…
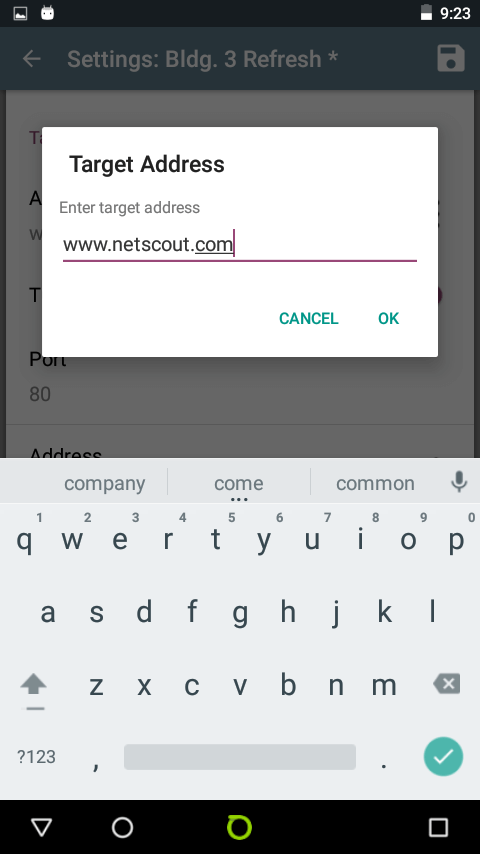
Reachability
...and select OK.
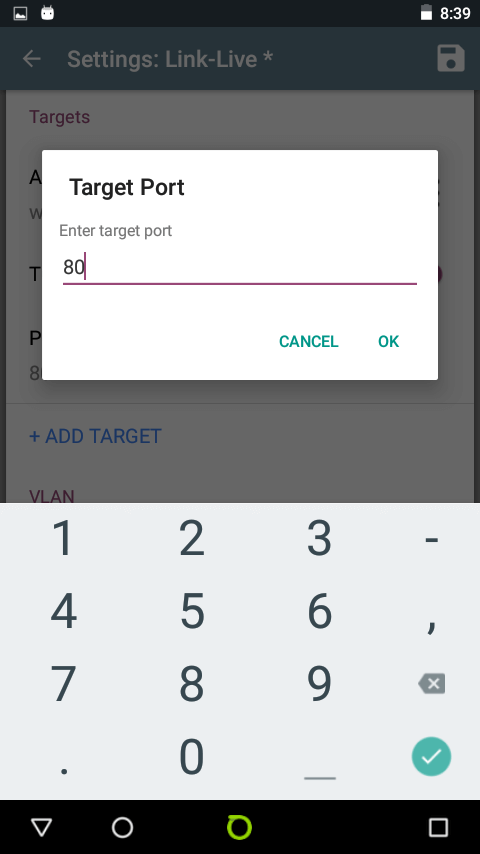
Reachability
As part of this test, you may want to specify a specific port. Input the target port and select ok.
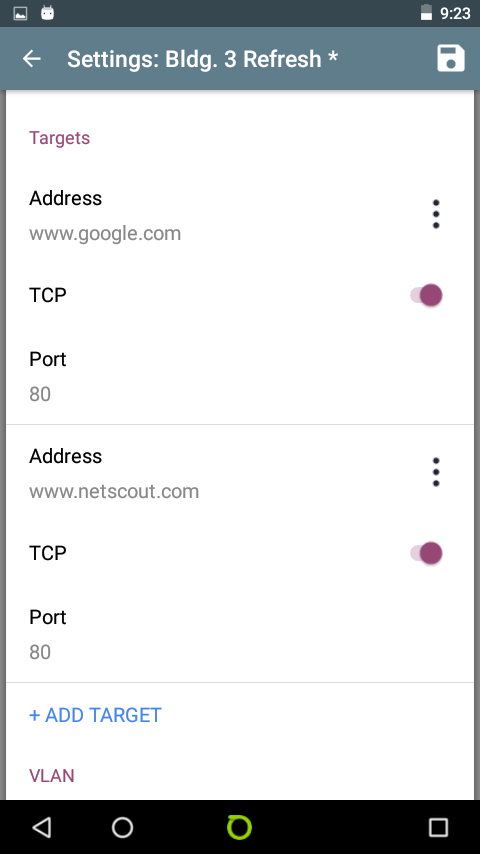
Reachability
Repeat this process as needed up to 10 targets.
Tap to configure VLAN…
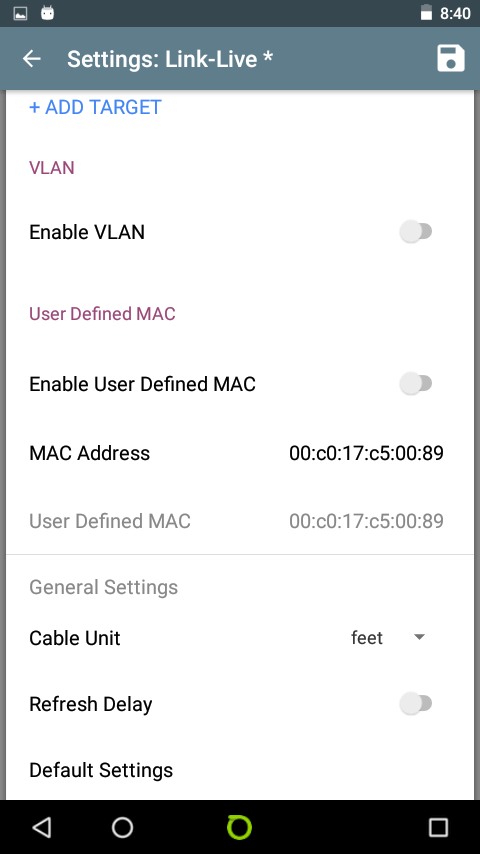
VLAN Configuration
LinkRunner G2 allows you to define the specific VLAN settings.
Turn on Enable VLAN.

VLAN Configuration
Tap VLAN ID field.

VLAN Configuration
Input your VLAN ID and select OK.
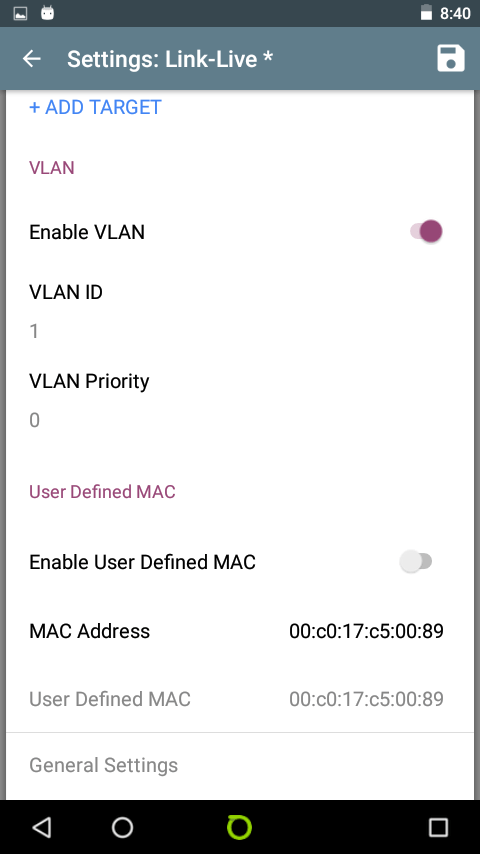
VLAN Configuration
Tap VLAN Priority field.
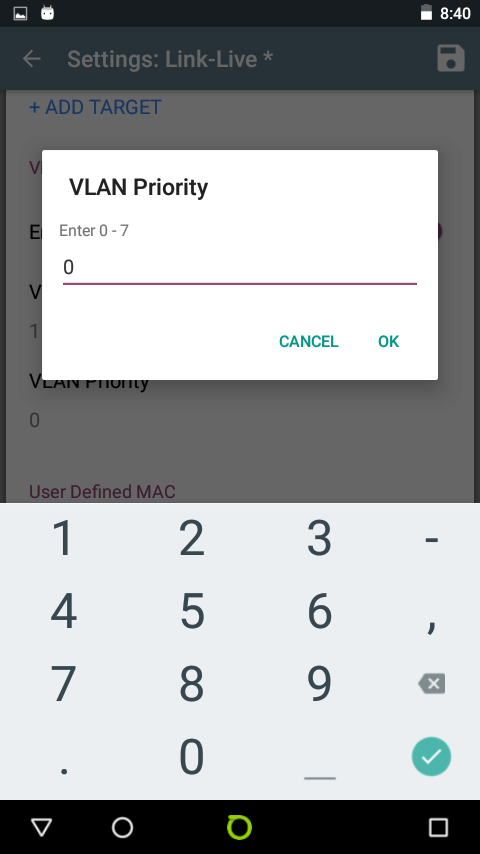
VLAN Configuration
Input your VLAN Priority setting and select OK.
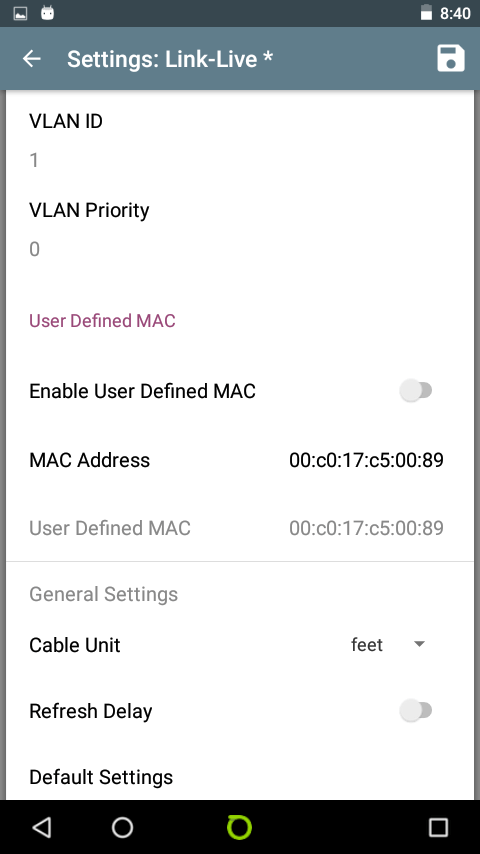
User Defined MAC Configuration
LinkRunner G2 allows you to assign a specific MAC address to the platform.
Turn on Enable User Defined MAC.
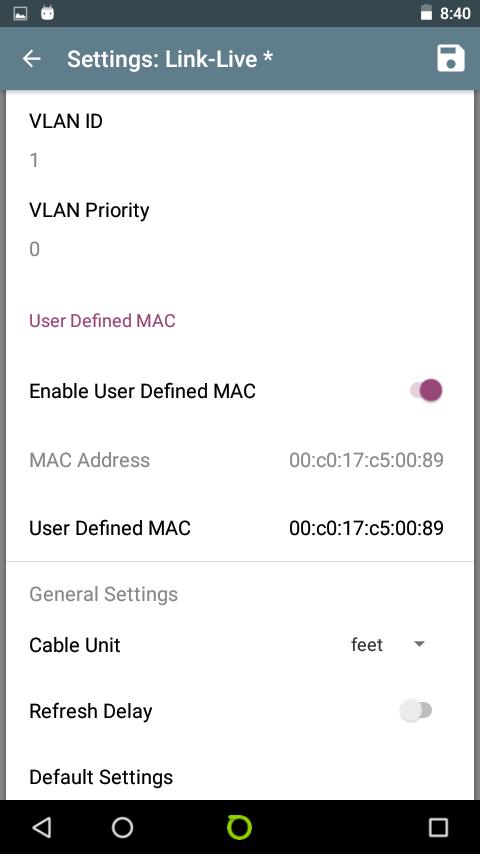
User Defined MAC Configuration
Tap on User Defined MAC.
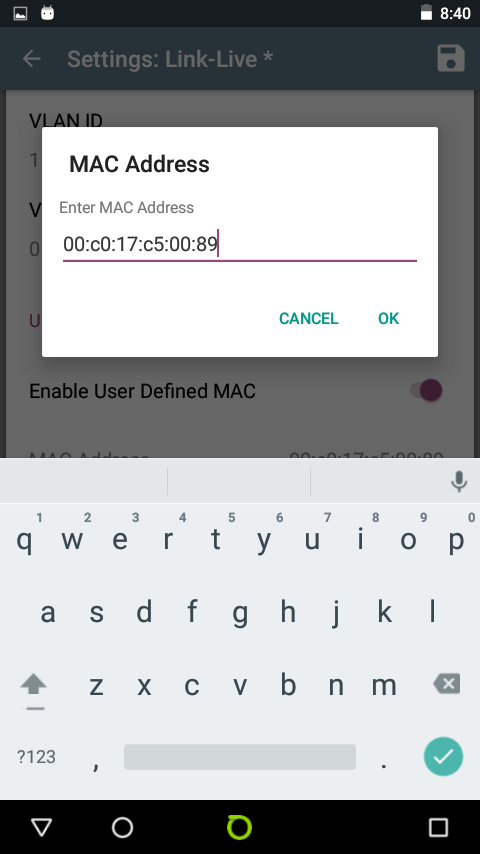
User Defined MAC Configuration
Input a MAC address and select OK.

General Settings
Under General Settings you can define feet or meters, define the refresh delay or revert back to default settings.
Tap on Cable Unit settings.
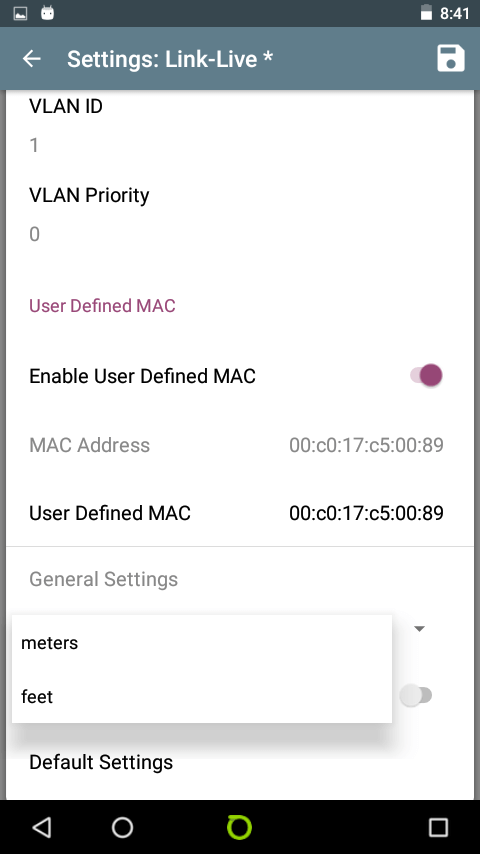
General Settings
Here you can set meters or feet.
Tap on the HOME icon to return to the home screen.